
Core shed storage and racking layout: floor, aisles and retrieval time

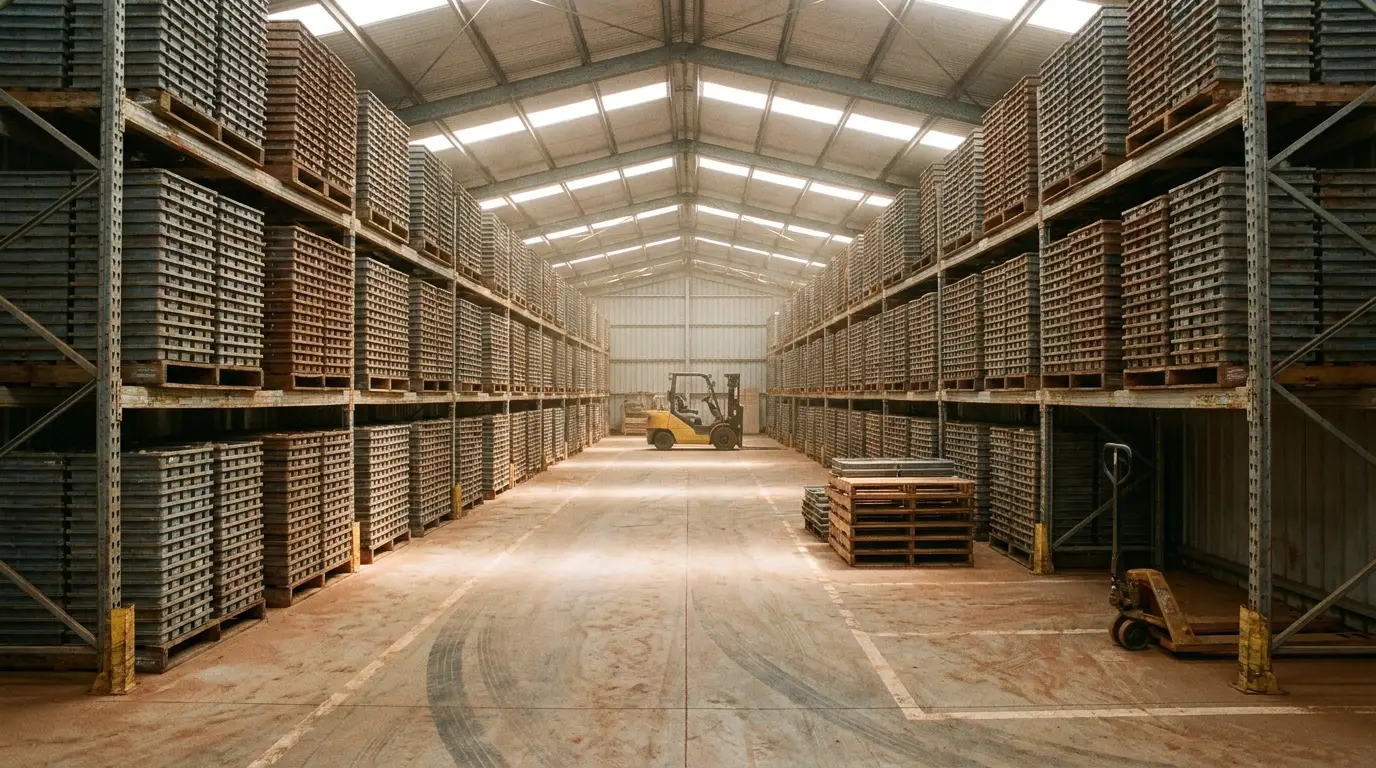
Most advice about storing drill core stops at the tray and the pallet under it. Those are the easy questions, and we have answered them elsewhere. The hard questions are the ones a core shed asks at facility scale: how many square metres do you actually need, how much of the building is aisle you can never use, how long does it take a geologist to get one hole back out, and will the slab hold what you are about to put on it. This is a layout and retrieval-economics guide to core shed storage and racking, worked through with arithmetic you can rerun on your own numbers.
What actually decides a core shed's size and cost?
Three things, in this order: how high you rack, how wide your aisle has to be, and whether every position has to be directly reachable. The tray profile and the pallet spec barely move the building. They matter enormously for whether the core survives and whether the stack is safe - and we cover both in drill core tray sizes and drill core tray handling - but they are not what sets the footprint you have to build, lease or convert.
The reason this gets missed is that a core shed is usually specified by the people who care about the core, not by the people who care about the shed. So the tray is chosen carefully, the pallet is chosen carefully, and then the layout is whatever fits the building that was already there. That is backwards, and it is expensive in a way that compounds: a layout decision made once is paid for on every retrieval, for as long as the program runs.
How much core actually needs storing?
More than most first estimates assume, and the national numbers show why. In the March quarter of 2026 alone, Australian mineral exploration ran to 3,120.1 km of metres drilled (seasonally adjusted), a rise of 9.3% or 264.8 km on the previous quarter, against mineral exploration expenditure of $1,093.7 million (Australian Bureau of Statistics). That is one quarter, and it is the whole country.
Two honest qualifications on that figure. First, it covers all mineral exploration drilling - reverse circulation, percussion and rotary as well as diamond - and only the diamond fraction produces core that has to be trayed, racked and kept. Second, national totals tell you nothing about your own program. But they do establish the shape of the problem: core accumulates continuously, it is almost never thrown away, and a shed sized to today's holdings is a shed that is full before the drilling budget renews.
It is worth knowing what the mature version looks like. The Geological Survey of Western Australia runs two purpose-built core libraries - the Perth Core Library at Carlisle and the Joe Lord Core Library at Kalgoorlie (wa.gov.au). Purpose-built is the operative phrase. A core farm that grows for twenty years inside a shed designed for something else is a very different, and much worse, building.
Why most of a core shed is aisle
Here is the geometry nobody puts in a brochure. Take the standard arrangement: two rack rows back to back, single-deep, serviced by one aisle. Each row is about 1.2 m deep - the depth of a 1165 or 1200 mm pallet plus a little clearance - so the rack itself accounts for 2.4 m of the module. Everything else in that module is aisle.
| Aisle width | Module depth (2.4 m rack + aisle) | Aisle share of racked floor | Typical truck |
|---|---|---|---|
| 2.5 m | 4.9 m | 51.0% | Reach truck |
| 3.0 m | 5.4 m | 55.6% | Reach / small counterbalance |
| 3.5 m | 5.9 m | 59.3% | Counterbalance forklift |
| 4.0 m | 6.4 m | 62.5% | Larger counterbalance |
Between half and nearly two-thirds of your racked floor is air you drive through. That is not a design failure - it is what access costs, and every layout that stores things you need to get back out pays it. Confirm the aisle from the published turning and aisle specification for the truck you actually run, loaded, rather than from a rule of thumb; the gap between a reach truck and a counterbalance in that table is over a tenth of your building.
The instinct at this point is to attack the aisle. Resist it. A narrow aisle makes every retrieval slower, raises the chance of a truck clipping an upright, and locks you into one class of machine forever. The next section is where the real saving is.
Racking higher beats packing tighter
Take the same module and work out the floor area consumed per pallet position. Two rows, two positions wide per row across a 2.8 m bay, so four positions per level in each module footprint. Divide the module area by four, then divide again by the number of levels. The result is the only floor-efficiency number worth arguing about.
| Floor m² per pallet position | 1 level | 2 levels | 3 levels | 4 levels | 5 levels |
|---|---|---|---|---|---|
| 2.5 m aisle | 3.43 | 1.72 | 1.14 | 0.86 | 0.69 |
| 3.0 m aisle | 3.78 | 1.89 | 1.26 | 0.95 | 0.76 |
| 3.5 m aisle | 4.13 | 2.07 | 1.38 | 1.03 | 0.83 |
| 4.0 m aisle | 4.48 | 2.24 | 1.49 | 1.12 | 0.90 |
Read it across, then down. Narrowing the aisle from 3.5 m to 2.5 m - a real operational sacrifice - takes floor per position from 4.13 m² to 3.43 m², a 17% saving. Going from one level to four at the same 3.5 m aisle takes it from 4.13 m² to 1.03 m², a 75% saving. Height wins by a factor of more than four, and it costs you nothing operationally except the reach of your truck and the clear height of the building.
Which reframes the whole brief. When someone says the core shed is full, the first question is not "can we tighten the aisles" or "do we need another shed" - it is how much clear height is there above the top beam, and what will the truck reach. A shed with 8 m to the underside of the trusses and core racked two levels high is a building being used at half its capacity.
"Every core farm I have walked through that ran out of room had metres of empty air above the top beam. They were arguing about aisle widths and looking at a second shed. Measure your clear height and your truck's lift before you price a single square metre of new floor - most of the time the extra capacity is already inside the walls you own."
- John Meir, Sales Leader, 20+ years in plastic materials handling
Racking higher is a structural and safety decision as much as a storage one. Australian pallet racking is designed and installed to AS 4084:2023 (Steel storage racking), and the duties around loading, inspection, damage and stability sit under general work health and safety law (safeworkaustralia.gov.au). Taller means higher beam loads, higher upright reactions and more consequence from an impact, so the rack design has to be done properly and the load signage has to match what you actually put up there.
Single-deep or double-deep? The retrieval trade
Double-deep racking - two pallets deep on each side of the aisle - is the obvious next idea once you have racked as high as you can. It works, and the arithmetic is straightforward: the rack depth per module goes from 2.4 m to 4.8 m while the aisle stays the same, so at a 3.5 m aisle you get eight positions per level in an 8.3 m module instead of four in a 5.9 m module. Floor per position falls from 4.13 m² to 2.91 m², a 29.5% saving.
Now the cost, which is the part that gets left out. You cannot reach a back position without first taking out the front one. If the tray you want is equally likely to be in front or behind, the expected handling is 0.5 × 1 move + 0.5 × 3 moves = 2 moves, against exactly 1 move for single-deep. So the trade is roughly 30% less floor for double the handling per retrieval, plus a deeper-reach truck and a wider practical aisle to work it.
Whether that is a good deal depends entirely on why the shed exists:
- Live exploration core that geologists re-pull for re-logging, re-assay, structural work or metallurgical sampling: single-deep. The handling penalty lands every time, on the most expensive people in the building, and it compounds over a multi-year program.
- Closed-out archive that is kept for compliance and touched once in a decade: double-deep is close to free floor. The penalty is real but almost never paid.
- Most real core farms: both. Split the shed - single-deep bays near the door for active and recent holes, double-deep at the back for the long tail. This is the layout decision with the highest return in the whole exercise, and it costs nothing but thinking about it before the rack goes in.
The same logic argues against free-standing floor stacks once an archive gets deep. A block stack is effectively racking that is many pallets deep in every direction, so retrieval time grows with the size of the archive instead of staying flat. Low volumes on a level, sound floor are fine on the floor; a growing farm is not.
Will the slab take it? Floor loading and dead weight
Two loading questions, and most people only ask the easier one.
The first-pass check is average load per square metre. At a 3.5 m aisle and four levels you have about 1.03 m² of racked floor per pallet position; at, say, 700 kg for a loaded column of trays plus its pallet, that is roughly 680 kg/m² averaged across the racked footprint. Compare that against the slab's design uniformly distributed load. If you are converting an existing shed rather than building one - which is what usually happens - this comparison is worth doing on the back of an envelope before anything else, because it can rule out a layout in five minutes.
The real check is that a rack does not apply a uniform load at all. It collects everything and delivers it through the upright baseplates as concentrated reactions, onto a few tens of square centimetres each. That is the number that punches through a slab, and it is not derivable from an average. Ask your racking supplier for the baseplate reaction at your bay configuration and level loading, and hand it to a structural engineer with the slab's design details and thickness. Nothing in this article substitutes for that.
The third number is the one nobody counts: the pallets themselves. At farm scale the deck's own mass becomes structural. A thousand pallet positions on the 24.3 kg heavy-duty Australian-standard deck above is 24.3 tonnes of pallet, sitting permanently on your beams and your slab and doing no work. The 17.6 kg deck alongside it publishes identical figures - 10,000 kg static, 2,000 kg dynamic, 2,000 kg racking - and would put 17.6 tonnes in the same building. That is 6.7 tonnes of dead weight removed for the same published capacity.
The honest trade-off is in the base construction: the heavier deck has a full-perimeter base, which spreads load continuously on beam rails and is more forgiving of imperfect beam alignment and point loading; the lighter one runs three skids, which is well proven but discontinuous, so skid-to-beam alignment matters more. Both are 4-way entry. Check which suits your beam layout before you chase the tonnage - and note that the same weight-versus-rating question shows up in the hands of anyone lifting an empty deck, which we work through in pallet weight and manual handling.
How do I plan for the next five years of drilling?
Size the building for the program, and the rack for today. Those are different decisions and conflating them is the standard mistake. Steel is comparatively easy to add into space you already have; clear height, slab capacity, door position and hardstand access are effectively fixed on day one.
So the sequence that works is: establish clear height first, because that is where the 75% saving lives and you cannot retrofit it. Confirm slab capacity next, because it caps how high you are allowed to go regardless of the roof. Then set the aisle from the truck you will still be running in five years - not the one you borrowed for the first stack. Only then fill the volume with rack, leaving whole bays' worth of floor and height deliberately empty rather than spreading today's core evenly across the whole shed.
Two practical habits that pay for themselves. Keep a staging area near the door that is not racked at all - trays arrive from the rig in bulk and have to be logged, cut and sampled before they are put away, and a farm with nowhere to stage ends up storing work-in-progress in the aisle. And keep the active window - the current program's holes - in the most accessible bays, moving them back as they close out. A core farm that is organised by accession order rather than by access frequency will be slow forever.
What to standardise so the shed keeps working
Layout only stays efficient if the things going into it are consistent. Standardise on one external tray footprint, one pallet family and one column height, and let the core size vary inside that envelope rather than outside it - the full reasoning, including how to hold the footprint constant across a mixed BQ/NQ/HQ/PQ program, is in drill core tray sizes. Mixed footprints turn a rack into a shelving problem and destroy the arithmetic above.
Standardise the index too. The retrieval numbers in this article assume the operator knows which bay to drive to. If finding the hole takes longer than fetching it, the layout is not your bottleneck - a location system that records hole, from-to depth and bay position, and is updated when trays move, is what makes a single-deep bay worth the floor you spent on it. The handling and protection side of the same job, rig to shed, is covered in drill core tray handling, and the load ratings that govern what a pallet may carry on a beam are in plastic pallet load ratings.
Brief a supplier with four facts and the spec falls out: your loaded column mass, your beam span, your clear height, and how often a hole gets re-pulled. The first two size the pallet, the third sizes the building, and the fourth decides single-deep or double-deep. Compare rackable decks and their published weights across the plastic pallet range, see the rest of the resources kit in the mining and resources range or the mining industry hub, browse everything in the catalogue, or send your column mass, position count and freight postcode for a spec-backed quote.
Common questions
How much floor space does a core shed need?
Work it from pallet positions, not from metres of core. Take your loaded trays per pallet column, divide your tray count by that to get positions, then divide by the floor area per position for your layout. On two back-to-back single-deep rows with a 3.5 m aisle, one ground-level position occupies about 4.1 m² of racked floor; at four levels high that falls to about 1.0 m². Then add a planning allowance on top for cross-aisles, the door apron, the logging and cutting bench and the scanning bay - those are not small, and they are usually what blows a first estimate.
How wide does the aisle need to be in a core shed?
Take it from the published turning and aisle specification for the truck you actually run, loaded, not from a rule of thumb - a counterbalance forklift needs materially more than a reach truck, and the difference decides a large share of your building. The important point is that whatever you choose, the aisle will be roughly half to two-thirds of the racked footprint. Because narrowing it delivers far less than racking higher does, the aisle is usually the wrong place to economise, and squeezing it makes every retrieval slower and more likely to clip an upright.
Is double-deep racking a good idea for drill core?
For a dead archive, often yes. For active core, usually no. Double-deep gets roughly 30% more positions into the same floor because it halves the number of aisles, but you cannot reach a back position without first moving the front one - so the expected handling per retrieval roughly doubles. If the shed exists so geologists can re-pull specific holes for re-logging, re-assay or metallurgical sampling, that cost lands every single time. The pragmatic answer is a split layout: double-deep for the long-tail archive at the back, single-deep for active and recent holes near the door.
How do I work out the floor loading of a core storage rack?
Two numbers, and only one of them is the one that matters. The average kilograms per square metre across the racked footprint is a useful first-pass check against the slab's design uniformly distributed load. But a rack does not deliver a uniform load - it delivers concentrated reactions through the upright baseplates. Ask your racking supplier for the baseplate reaction at your bay configuration and level loading, and give that to a structural engineer along with the slab's design details. In a shed converted to a core farm rather than built as one, this is the check that most often gets skipped.
Should I stack core trays on the floor or rack them?
Free-standing columns work for low volumes on a level, sound floor, and cost nothing but floor area. They stop working as soon as the archive is deep, because the only way to reach a tray in the middle of a block is to unstack everything above and around it - retrieval time grows with the size of the archive rather than staying flat. Racking decouples the two: any position is reachable in one move regardless of how big the farm gets. The changeover point is usually when someone starts complaining about how long re-logging takes, not when the floor runs out.
What pallet should go under stacked core trays in a shed?
A rackable deck sized to the racking rating at your beam span, with a base that suits your beams - not the headline static figure. We work the tray-to-pallet sizing through in detail in our guides to drill core tray sizes and drill core tray handling. At shed scale there is a second consideration those guides do not cover: multiply the deck's own mass by the number of positions. Across a thousand-position farm the difference between two decks with identical published ratings can be several tonnes of dead weight sitting permanently on your beams and your slab.
Sources: mineral exploration metres drilled and expenditure, Mineral and Petroleum Exploration, Australia, March quarter 2026, Australian Bureau of Statistics (3,120.1 km metres drilled seasonally adjusted, up 9.3% / 264.8 km; mineral exploration expenditure $1,093.7 m — the metres figure covers all mineral exploration drilling, not only diamond core); purpose-built core library facilities, Geological Survey of Western Australia (wa.gov.au); pallet racking design, installation and loading, AS 4084:2023 Steel storage racking (Standards Australia), with storage-racking duties under Safe Work Australia guidance; pallet test methods, ISO 8611 (Pallets for materials handling — Flat pallets). Pallet weights and load figures are the published manufacturer figures for the specific models named and were current at the time of writing. All floor-area, aisle-share, retrieval-move and floor-loading figures are worked planning arithmetic from the stated assumptions (1.2 m rack row depth, 2.8 m bay width, two positions per bay level, 700 kg per loaded position) — they are a method for sizing your own layout, not published limits, and they do not replace a rack supplier's design or a structural engineer's assessment of your slab. Not a quote.